How to Give Permissions to Another Users from Office 365 Mailboxes?
Microsoft 365 allows to assign mailbox delegate permissions like Read and Manage, Send as and Send on behalf to other users. Due to organizational needs, there is need to assign or transfer these permissions to certain mailboxes allowing them to perform certain actions which they were restricted before..
These permissions can be assigned to other user mailboxes via Microsoft 365 admin center or Exchange Online PowerShell cmdlets.
Let us know what these mailbox permissions are:
Quick Solution - App Registration in Microsoft Azure for Office 365 Migration:
https://www.kdetools.com/support/microsoft-azure-app-registration.html
Assigning Permissions to Another User Mailboxes via Microsoft 365 Admin Center
Now, that you know what permissions a user mailbox can assign to other user mailboxes, let us know the procedure to assign it. First we are going to perform it using the Microsoft 365 Admin Center interface. Here are the steps:
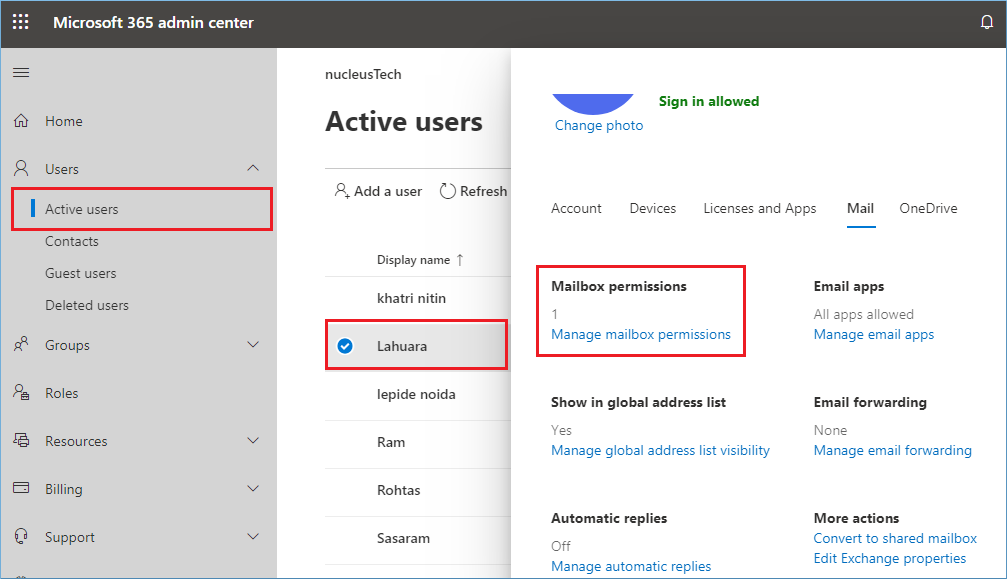
Steps:1- Then, go to Users>Active Users. Double-click on any desired user and then under Mail Settings section, click Edit option against Mailbox permissions.uj:
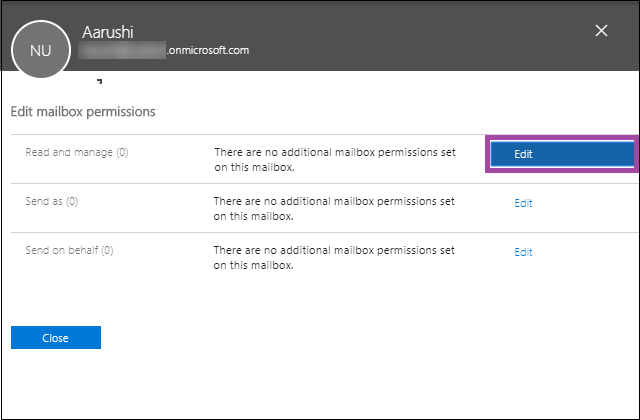
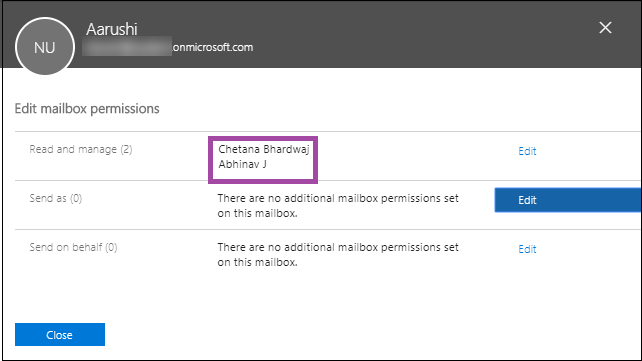
Steps:2- A new page Edit mailbox permissions will get open. Here, to set permissions for user mailboxes, click Edit against Read and manage feature. :
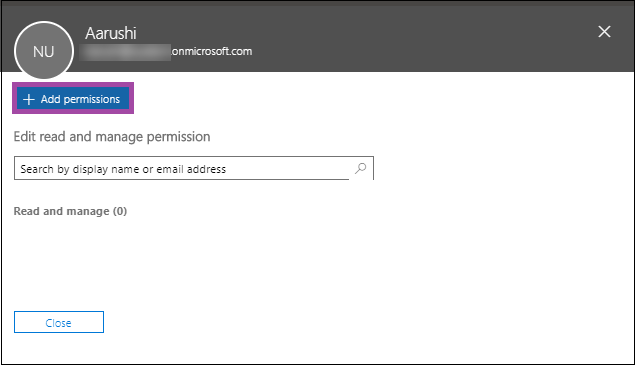
Steps:3- Click +Add permissions to add the user mailboxes whom you want to assign this permission.
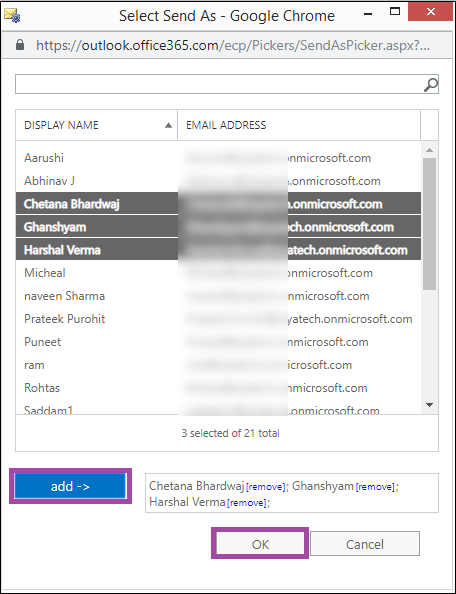
Steps:4- Select the desired user mailboxes from the list and then click Save.
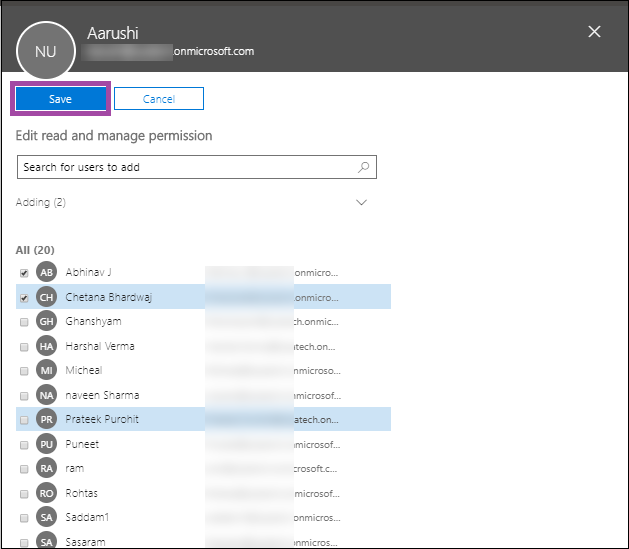
Steps:5- Thus, user mailboxes are assigned permissions.
Similarly, you can assign Send as and Send on behalf permissions to other user mailboxes.
Assigning Permissions to User Mailboxes through Exchange Admin Center
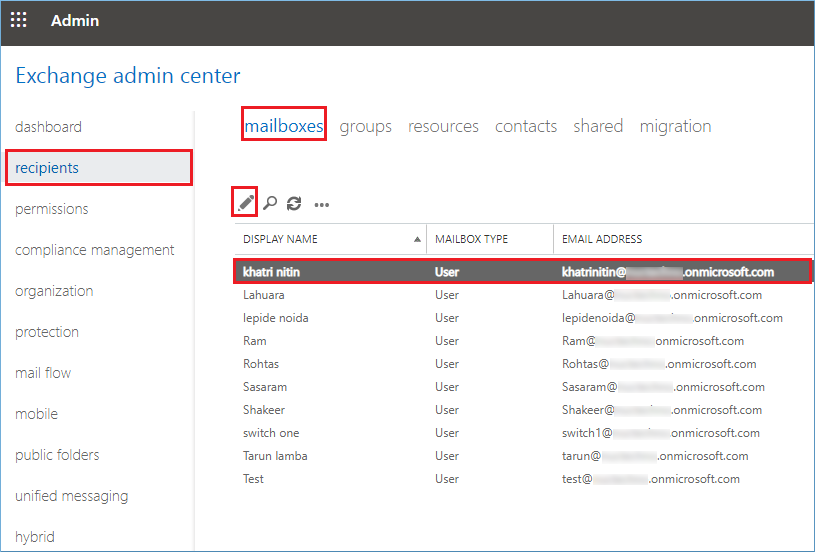
You can also set permissions for the selected user mailboxes via the Exchange Admin Center.
Now, head on to the steps through which you can assign these permissions.
Steps:7- Open your Microsoft 365 account with the login credentials. Click Admin and then open EAC by navigating to Admin centers>Exchange.
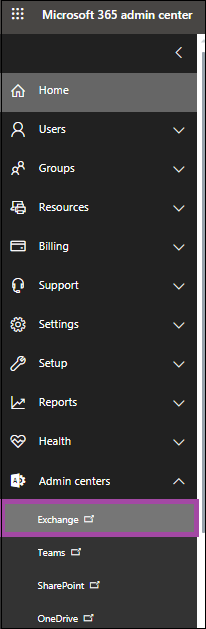
Steps:8- Open your Microsoft 365 account with the login credentials... Click Admin and then open EAC by navigating to Admin centers>Exchange..
Steps:9- Open your Microsoft 365 account with the login credentials..Click Admin and then open EAC by navigating to Admin centers>Exchange.
Open your Microsoft 365 account with the login credentials....Click Admin and then open EAC by navigating to Admin centers>Exchange.
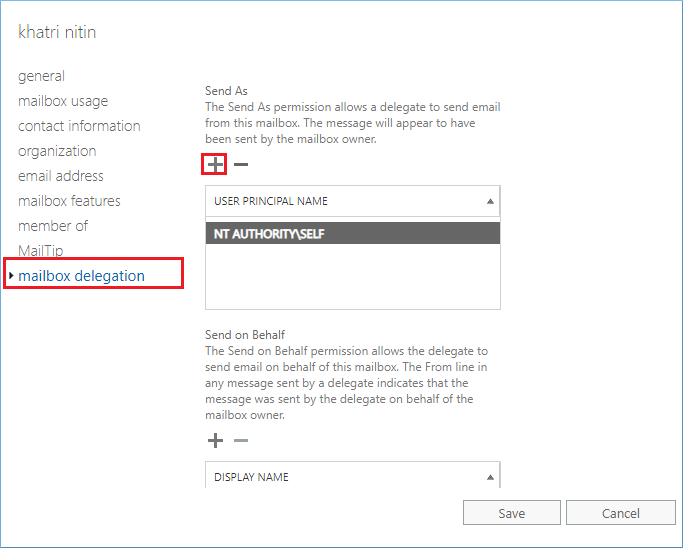
Likewise, you can assign other mailbox permissions like Send on behalf and Full access.
Another way to assign these mailbox permissions to the Microsoft 365 user mailboxes is the use of PowerShell cmdlet. It is quite a technical procedure and requires prior knowledge of using and running cmdlets in the Exchange PowerShell.
If you are interested in data migration between Microsoft 365 tenants, perform bulk mailbox migration to Microsoft 365 or any other Microsoft 365 migration, we offer the perfect solution from our end. The KDETools Office O365 Migration is designed specifically to help its users in attaining a smooth, simple and efficient cloud migration
Related Blogs
Related Blogs


![]()
D - 478, Sector - 7,
Dwarka, New Delhi - 75
India
Call Us
91-9555514144
You can also find us:
![]()

![]()
KDETools Software® is the Registered Trademark of KTools Software Pvt Ltd
© Copyright 2019 www.kdetools.com. All Trademarks Acknowledged.