
Please follow the steps discussed below to assign application impersonation in Office 365 using Exchange Admin Center or Console (EAC): .
Downlaod Free Trial Version Windows or Mac Version


Free Demo: *Download enables you to preview the converted file and save 30 items per folder.
![]()
How to Enable Impersonation in Microsoft Office 365 or Exchange Server
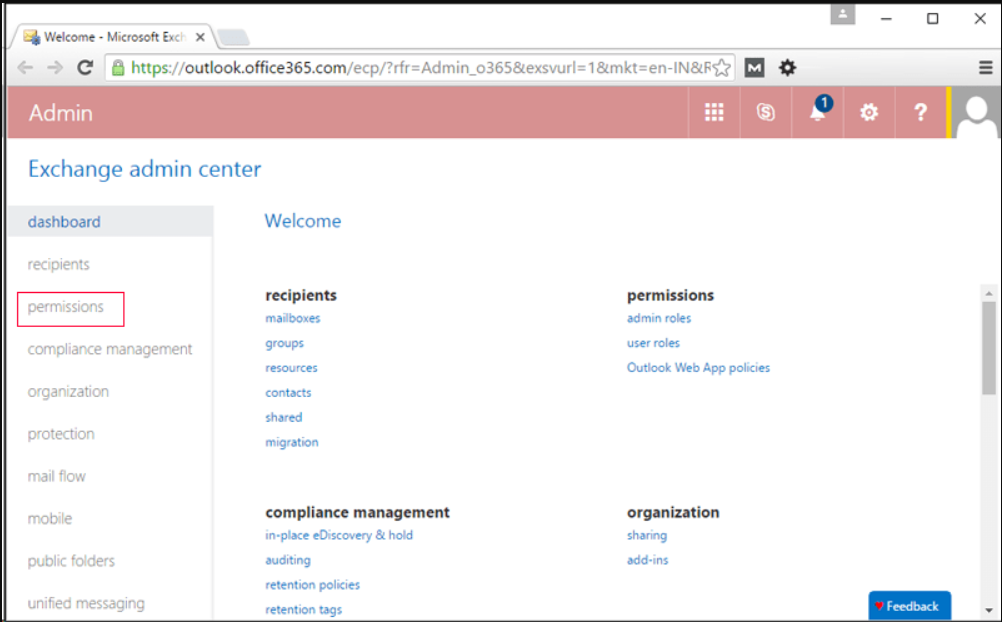
Step 1: Log into your Microsoft Office 365 account.
Step 2: At left Navigation pane, click on “Permissions” (under Dashboard).
![]()
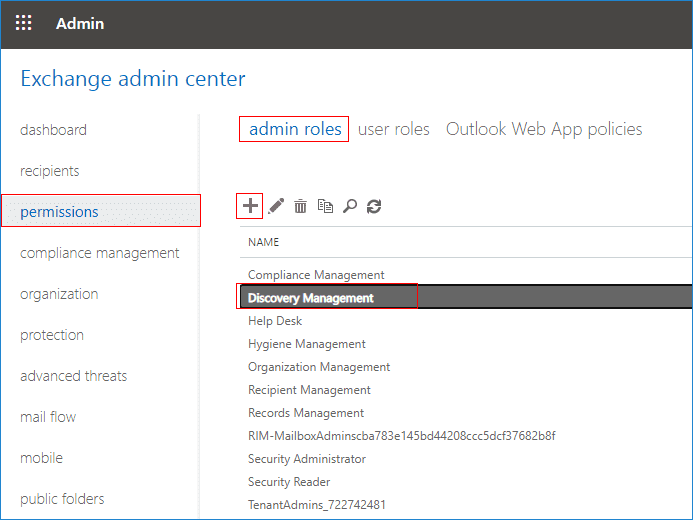
Step 3: Click on “Discovery Management” in right pane
![]()
Step 4: After clicking, a Discovery Management window will appear.:
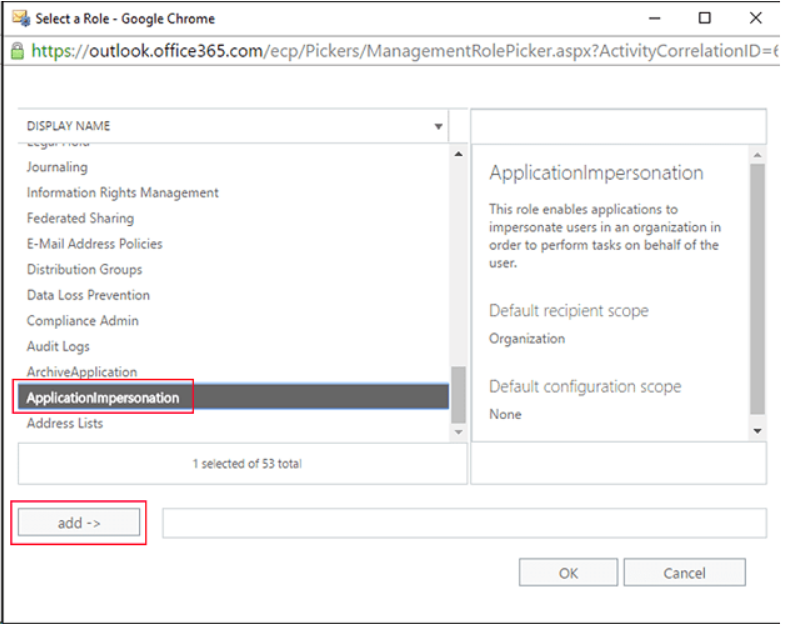
Step 5: Click on (+) button, select “ApplicationImpersonation” and click “add” button → Click “OK”.
![]()
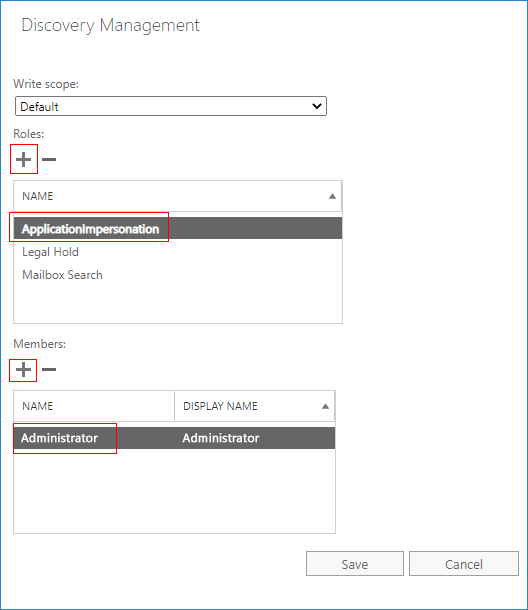
Step 6: Verify if under the Roles, “ApplicationImpersonation” has been added or not..
![]()
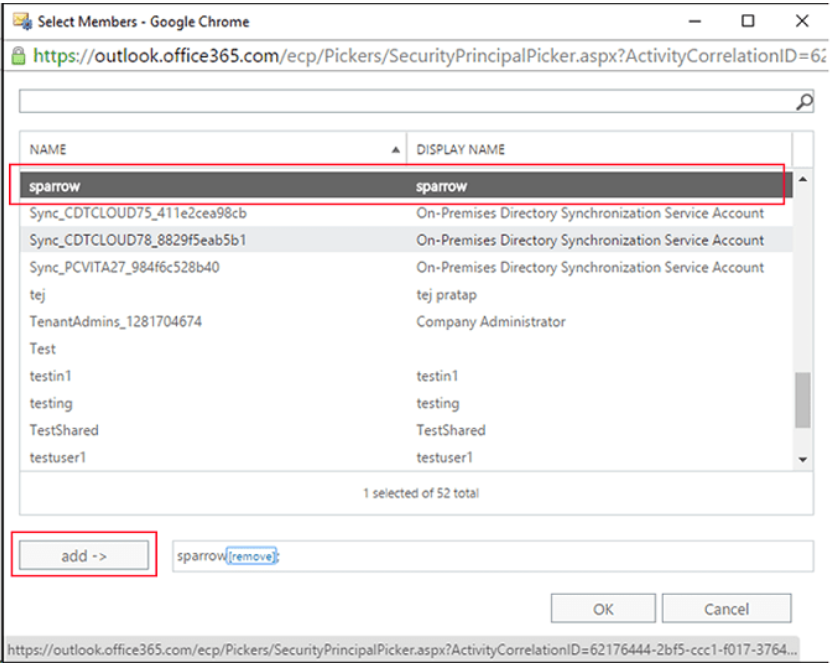
Step 7: At Members section, click on (+) button → a new window will appear, select user name & click on “add” button → click OK.
![]()
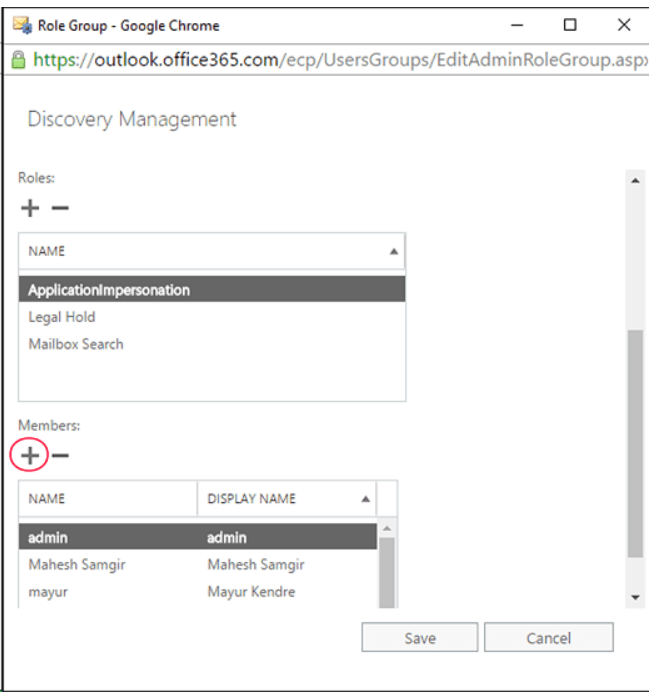
Step 8: Verify if the username can be seen under “Members” section and click on “Save” button.
![]()
Note: If you are importing all user's mailboxes at once, then you need to provide a few more permissions
Search More Blogs
Recent Posts


![]()
D - 478, Sector - 7,
Dwarka, New Delhi - 75
India
Call Us
91-9555514144
You can also find us:
![]()

![]()
KDETools Software® is the Registered Trademark of KTools Software Pvt Ltd
© Copyright 2019 www.kdetools.com. All Trademarks Acknowledged.